Tuesday, December 20, 2011


And the old becomes new...

There is something precious about making the old, new again.

Trash
When I was just a wee thing, my mom took old Coke bottles and created three regal wise men presenting gifts to their King in flowing, shimmering robes.  


I'm sure in the early 70's this was the best way to recycle glass! However, with today's methods, I'm not so sure!  Regardless, I'm thrilled my mom created these guys! They hold a special place in my heart.  So when she was about to do the unthinkable, I pounced and gave them a new home!  Since then, these guys have come out every year in their spectacular glory to help me celebrate the holidays!


Old bottle, new life.


Discarded and forgotten
A couple years ago, it was time for my sweet grandparents to make "The Move" from their home of many years, dressed from top to bottom with heart-warming memories, into a smaller place with little upkeep required.  Imagine the treasures found in the basement and attic as they prepared to downsize!! My favorite treasure...?  Two boxes of old glass ornaments!


These are the real deal!! They are gorgeous!!! They hung on my grandma's tree for years before she packed them away to be replaced by the newer and shinier versions. But now they have a new home, displayed in a new way as the jewel of my mantel, the piece de resistance, in all their old grace and simple charm.


Old ornaments, new life.


Old to new
And this is the will of Him Who sent Me, that I should not lose any of all that He has given Me, but that I should give new life and raise them all up at the last day.  ~John 6:39


Why wait for that last day!?  New life lies just a decision away! 

Look closer! What's your trash? It can be recycled!  Just put it in the hand's of the master creator. 

Have you been discarded and forgotten? Run into the arms of the one who loves you to death.  There is an empty spot on His "mantel" awaiting your arrival as the piece de resistance! 

This is the hope and joy in the season! This is why we celebrate Christmas! This is the reason for His birth!  


Old cross, new life.  


Friday, September 9, 2011


Homemade Doughnuts (quick and easy)

Warning  - this recipe is no where near good-for-you! I'm not even gonna try to attempt it by adding flax seed or protein powder or telling you that if you fry them in coconut oil you'll have added health benefits.  Oh no, this recipe is strictly to please my kids, who sometimes, after doing a really good job of eating healthy, just wanna splurge and I just wanna let 'em!


One of my favorite memories of going home to grandma's house in Pella, Iowa is homemade Doughnut Day! Ahhhh!!! There is nothing like a doughnut fresh out of the fryer and dipped in a sugary sweet glaze!  (I wonder if the owners of Krispy Kreme had a grandma like mine...) 


Not only did grandma make the most amazing doughnuts from scratch on D Day but EVERY ONE of my aunts, uncles and cousins who were in town, came over and we made it a party!  We all hung out around the kitchen table while grandma and her daughters worked the assembly line - drop, drain, dunk and distribute.  The excitement that permeated the room seemed to make the air buzz and the chair legs vibrate across the floor.  Lots of loud boisterous laughing, regaling of silly stories from years past, praising, in exuberant exaggeration, grandma and her minions for their never-fail ability to make the MOST amazing doughnuts in the entire UNIVERSE, and playful jockeying for the most doughnuts and their holes.  The memories could not be sweeter, or smell finer, or wrap me in more warmth than was in that kitchen on D Day!


A few years ago, I had grandma give me the recipe.  This was like a sacred act of passing on one's ancient history to the next generation in hopes that future generations would know where they came from!  This sacred act was performed over the phone in the country-folk way of giving directions:
"Head out on the road that takes you to Sue's Aunt's 2nd cousin's house - is she a 2nd cousin or a cousin once removed? - Anyway, turn at the farm with the three legged dog. You'll take the next right at the farm with the barn that blew down in '52.  Once you reach the Walnut tree where we buried Ol' Blue, turn left....."
Hear this - I LOVE this kind of stuff!!! So, when I got grandma's recipe straight from her mouth and not some old cookbook, I knew I had the real thing; a tried and true recipe with little secrets from the one who perfected, not only the ingredients, but the technique as well!!


Sadly, since receiving the recipe 6 years ago, I have made the doughnuts 4 times! Once as a tester batch, immediately after talking with grandma, which turned into a big fail! A second time, shortly after that, as another tester that was a huge success! A third time, shortly after that, for a Halloween Open House, which was an even greater success, and last year on the driveway to pass on a little love to my neighbors!  Let me just say this..... it is VERY time consuming - all that rising and punching, the making of mashed potatoes if you don't already have some made, the scalding of the milk just right so as not to kill the yeast...  Phew! It's a lot of work! Now I understand why Grandma only did this once a year when we pleaded and cajoled, bribed and outright begged! She had to start the night before, in order to have an afternoon of doughnuts for the ones she loved!  What a sweet woman with a servant's heart!!! I just love her!  Thanks, Grandma!!!


And so, here is the good news!  I found a way to make doughnuts that takes a 20 minute jaunt to the store for one thing and 5 minutes of prep once you get home.   Biscuits!!  You know those pre-made, uncooked biscuits that come in those refrigerated containers that you pop open by whacking on the edge of the counter!!!  To this day, they freak me out! I'm never prepared for the pop!! Or maybe, I'm too prepared for the pop so when it happens my tension releases in one terrified squeak!  


Anyway, it's as simple as popping one of those open, cutting out a center hole with a knife or shot glass, DROPping them in the heated oil to cook to a golden brown, pulling them out to DRAIN on a paper towel, DIPping them into the easy already-made glaze, and DISTRIBUTing them to those who are soooo excited to grab one that they are practically crowding you into the hot oil!


Some of my gluten-free friends are wondering at this point if I found gluten-free biscuits for my son. Sadly, no.  However, you could make your own from scratch easily enough - 10 minutes max - faster than a trip to the store!  I may have to try this myself! So, now you're wondering if poor Ian had to sit there and watch us delight ourselves with this most sinful treat.  No, I'm not that heartless!  It was Ian's free day! Three days strict diet, one day free - anything he wants (within mom's reason) and no ill effects! He's fortunate that way!  But let me know if you make your own biscuit dough from gluten-free ingredients and how they turn out! I would try it myself but it will be another 2 years before I break out the fryer again!!  :)


So, here's the recipe:


Glaze:
1/2 cup powdered sugar
1-2 TBS water
splash of lemon juice


Add the water a bit at a time to the sugar, along with a little splash of the lemon juice, until you have a glaze thick enough to coat your finger, but thin enough to drip back into the bowl.  Set aside for dipping.


BTW - We created an option... along with the glazed doughnuts, we also made sugared doughnuts.  We tried dipping a few of the doughnuts immediately into crystalized sugar.  (Try adding a bit of cinnamon to the sugar!)  The reviews were very positive but their first love is still the glaze. 


Doughnuts:
1 container homestyle biscuits
Vegetable oil or coconut oil - enough to go halfway up the doughnut - about 1/4  
      inch over the bottom of a deep pan (to prevent splashes).
OR a deep fryer


Directions:

Cut a hole in the center of each biscuit with a knife...


...or narrow shot glass.


Set aside.


If heating oil on the stove top, turn the heat to medium high.  If working with a deep fryer, turn the heat to 360.  You know the oil is ready when you dip a tester "hole" in the oil and it sizzles!


Be careful working with the hot oil!!! I wear those plastic gloves for washing dishes and use tongs to work the dough.


Set up your assembly line first before you dunk anything. (I like to set it up outside so I don't have that stinky oil smell that lingers long after the doughnuts have been eaten.)  From left to right....biscuits prepped for DROPping in the oil, the oil, a plate covered with paper towel for DRAINing the oil off the doughnuts, glaze for DIPping, and a serving platter to DISTRIBUTE the doughnuts!


Then get to it!


Pop!


Drop!


Drain!


Dip!


Distribute!


DIG IN!!!


Delicious, fast and easy!!! See if your kids don't think you're the bomb after this!!


And for those of you who know me well, you are likely appalled that I have posted a recipe that requires deep frying!  AND that I used something so processed and store-bought as pre-made biscuits! Well, it is a bit out of character, I admit, however, I will say that in keeping with my character, I am a traditionalist, I am occasionally practical, and I love to make my kids smile!  So, there is a time when tradition must be followed, when children must be allowed to indulge in their childhood dreams, and when one must be able to indulge those dreams quickly!!


Enjoy!  I think Eli is going in for round two!


Tuesday, August 9, 2011

Almond butter, chocolate chip cookies


Well, I'm back!

If you are thinking you must have missed a lot of entries this summer, you need not worry! (I know, it was totally stressin you out!)  I haven't done a THING with this blog for months! I have a feeling that's the way it's gonna go - all or nothin!!! Hopefully we are approaching "all"!  :0)


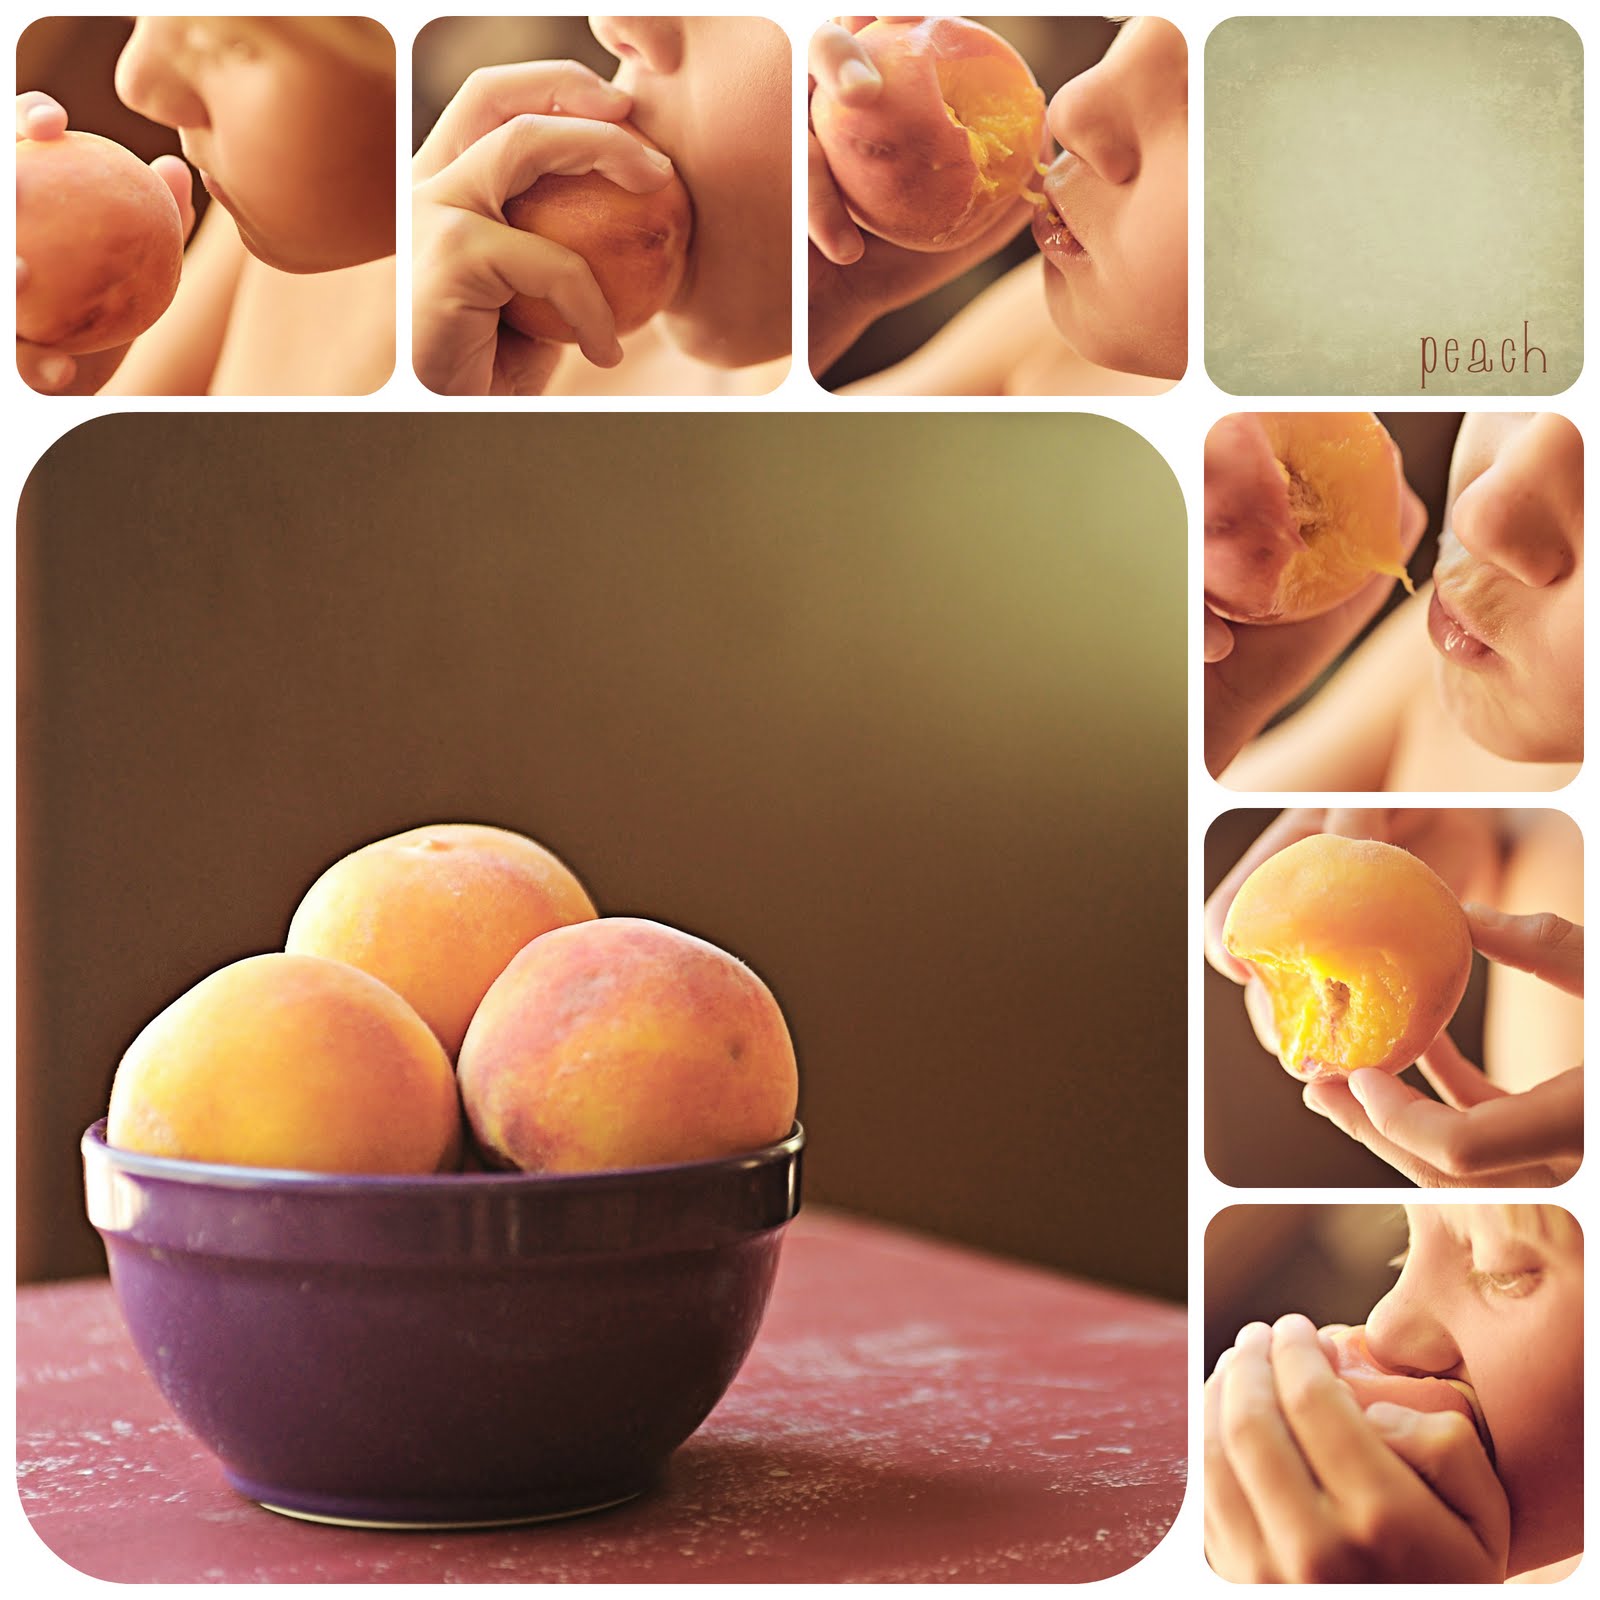
The last few days I have been playing with my camera instead of using it for work.  It's good I do this occasionally or I get stuck in ruts and forget to be playful with my images.  My play has consisted of taking snaps of things I love and putting the images into something a little more comprehensive, something that allows me to put the "parts" together that create a feeling for the "whole". 


Something like this....


or this...


Nothing like biting into a fuzzy, juicy, tender, cool peach and savoring the sweetness as it's juice runs down your chin!!!


I can taste it!


Below, you will see that I have been playing in collage mode with my recipe images as well!  Sadly, the images are not as big as I would like them but the recipe is as good as these cookies look!! Read on for this d-lish new cookie recipe!! This particular recipe is gluten and dairy free, but can also be made the traditional way with across-the-board substitutions.  It's so very easy and delicious, packed with vit. E - a powerful antioxidant - and protein, due to the almond butter, that you could ALMOST say it was good for you! But alas, a cookie, is a cookie, is a cookie, so, it's not that healthy!  


Interested?  If you're still not convinced, take a look at this!!


If you can pass that up, you've got more will power than me!


A new cookbook leads to fun new recipes and remaking them my way!!  Thanks to my older and wiser sister, I have a new cookbook! It's so beautiful!  I just LOVE a beautiful cookbook!!  Am I the only one!?? 


The recipes in my new cookbook are easy, use fresh ingredients, require minimal time, and taste absolutely fabulous!!  Curious!?  It's called Relaxed Cooking with Curtis Stone.  Some of you may have heard of him.  He hosts TLC's Take Home Chef.  Never seen it... so I didn't know him before I saw my sister's book... but I love his book and am his new greatest fan!!!


Surprisingly, (ha!) the first recipe I made out of this book is his Peanut Butter Cookies with Chocolate Chunks.  I, of course, changed things to fit my taste, items in my pantry, and love for my son - which requires an avoidance of dairy and wheat.  In this recipe, I use GF flours in place of all-purpose, coconut oil instead of butter, almond butter in place of peanut butter , and I cut down the sugar.  With half the substitutions, all or none, these cookies turn out delicious each time!


Let's talk about coconut oil....  I recall in the 80's, early 90's, when the recommended diet was very little fat with tons of carbs, that coconut oil was on the forbidden list.  In fact, it was so forbidden that simply thinking about it could cause a heart attack.  BUT jump ahead to the 21st century and now it's celebrated as the perfect replacement for butter.  What's up!? 

Honestly, I don't totally know.  According to my friends at wikipedia, it's something to do with the high saturated fat content which is thought to cause a rise in cholesterol.  That finding is actually very misleading and may have been a great cause of it's bad reputation.  The truth is, there is a large amount of saturated fat in coconut oil, however, a large proportion of that saturated fat is - in the form of(?) - lauric acid, which is found in breast milk and is thought to increase high-density lipoprotein (HDL)... which, if I remember correctly from my college days, is the "good" cholesterol, thus giving you a better cholesterol profile.  So, although the fat is saturated it is of a type that actually decreases the risk of cardiovascular disease by improving your cholesterol profile.

The other reason it likely got such a bad rap 30 years ago, was because most of the coconut oil used in products and scientific testing was partially-hydrogenated coconut oil.  The hydrogenation process changes the chemical structure of the oil and allows it to create saturated fats and/or trans fats (which raises LDL and decreases HDL resulting in a dangerous cholesterol profile).

So, and this is a BIG "so", the coconut oil must be in it's purest form to benefit your health!!  No hydrogenation!!  We call this "virgin" coconut oil.  I'm guessing if it doesn't say "virgin" on the label, it's probably been in bed with some hydrogen atoms!  It's likely hiding it's scarlet letter somewhere on it's label!!  Be aware and watch out!!  Only buy coconut oil in it's purest form!


Side note: I am NOT a scientist and did very little research on this.  If you are confused or have heart issues, talk with your dr before using coconut oil.  Don't base your health on my simplistic report of what I read on wikipedia! (Did I really just have to make that statement to protect myself from sue-er happy people!?!)

For other uses of coconut oil, wikipedia once again gave me more info to enrich my life....  it can be used as a moisturizer; when used in hair it can prevent protein loss keeping hair healthy and shiny; it can be made into a bug repellent keeping "sand fleas from invading the body" (in case any of you are headed to the beach for a last minute summer vacation). Unfortunately it didn't say anything about preventing mosquito invasion!!  I'd be all over that in a second!!  

Moving on to the cookie recipe!! ;0)

Preheat oven to 365.

In a small bowl, mix together:
1 cup gluten free flour mixture 
I use whatever I have on hand and make my own mix. I find the ones already made have some type of flour (potato?) that makes baked food mushy and heavy.  Me no likely.  So, this time I used brown rice flour (1/2 cuppish) which makes things crunchy and light, teff flour (1/4 cuppish) for a nutty flavor, and finished off with coconut flour b/c I didn't have enough of the others or any other options.  It seemed to do nicely with the other two.  I would have preferred to throw some kamut in there for the added protein and flavor but I didn't have any.  Use what you like!
1/2 tsp baking soda
1/2 tsp salt


In a large bowl - I use my blender bowl - mix:
1 cup almond butter
1/3 cup brown sugar
1/3 cup sugar


Once blended add:
8 TBS coconut oil (1/2 cup)
1 tsp vanilla
2 TBS honey
1 egg


Mix.
Once blended add the flour mixture.


Mix until fully incorporated.
Then add:
1 1/2 cups chocolate chips (a bit more if you can't help yourself!)


Mix it all together.


Drop in 3 TBS heaps on a cookie sheet. Bake for 11-13 minutes or until golden brown and tops are cracked and dry-ish - centers should still be soft but not wiggly. Let cool on pan for about 5-10 minutes until you can carefully transfer cookies onto a cooling rack to finish cooling.  


Eat up and Enjoy!!


Friday, May 27, 2011

Queso Fundido

This recipe is not your typical mexican queso.  There's a bit of a spin on it, making it less greasy and heavy, which I hope you will find refreshing and delightful!! I would like to try and make this with all goat cheese for my dairy intolerant son, but I haven't found the right mix yet. If you have, let me know!  

Also, this recipe reflects the way I cook.... the measurements are simply a guide, I likely add less or more to my preference and you can do the same - be the artist, not the lab scientist!

The players:

1/2 container of sliced mushrooms
1 onion
1 jalepeno
6 sundried tomatoes in oil
3 cloves garlic
olive oil
1 bottle Mexican beer


8 oz Marscapone Cheese
1 cup shredded Asadero or other melting Mexican cheese
4 oz goat cheese
Tortilla Chips


Chop the mushrooms, onion, jalepeno and sundried tomatoes and garlic* into very small pieces. I like to use my food processor b/c it's fast and easy to get the small pieces I want.   


*I do like to use my garlic press for the garlic so that the pieces of garlic aren't too big!


Besides, it is one of my favorite kitchen tools!


Heat a little splash of olive oil in a 4 qt sauce pan on med/high and then add the chopped veggies and garlic. 


Saute veggies until soft and slightly browned.  While this is happening you can keep an eye on the veggies as you shred the cheese.


I know my veggies are ready when I have little brown bits on the bottom of my pan which is called "fond" (which means bottom in French). This allows me to deglaze the pan with beer, adding all that flavoring into my queso.


To deglaze your pan, open your cold beer....


...and pour in just about a 1/4 cup into your hot pan - enough to make the beer bubble and sizzle in the pan but not so much that it stops sizzling and bubbling. 


Immediately, scrape the bottom of the pan with your wooden spoon or spatula to remove all the flavor (the fond) stuck to the bottom of the pan.  

Add the remaining beer... more or less as to your preference.  

Be careful where you set your beer or you may not have more to add.....


Allow the beer to simmer and evaporate.


Once the liquid is reduced to.... very little or nothing (without letting the veggies scorch and dry out), turn heat to med/low and add cheese slowly and continue to mix as it warms and melts. 

Do not over cook! Once it is melted you are good to go!!

You can pour it into a fondue pot to keep it warm.

If you plan to take it with you somewhere, do all the steps beforehand except melt the cheese and do that once you get to your party!

Then, dip your chip and enjoy!


Sunday, May 15, 2011

Vegetable Curry


I think I made a curry last night but wasn’t really sure so I had to look it up!  Wikipedia to the rescue!

Curry (pronounced /ˈkʌri/) is a generic description used throughout Western culture to describe a variety of spiced dishes, especially from Indian or other South Asian cuisines. Three spices found in most curry powders are turmeric, coriander, and cumin; a wide range of additional spices may be included depending on the geographic region and the foods being included (meats, fish, lentils, rice, etc.).[1] The word "curry" is analogous to "soup" or "stew" in that there is no particular ingredient that makes something "curry."

Well, that would explain my confusion – curry is a soup or stew or it’s a blend of spices including, most commonly, but not necessarily, turmeric, coriander, and/or cumin.   So, according to that indefinite definition, I did make a curry last night! 

This is a hearty vegetable stew that contains said spices, coconut milk, ginger and sweet potatoes.  It is as delicious as it is good for you!

I am all about my soups being rather thick, so if you would rather have a more liquid soup, skip the blender part of this recipe! However, I have to tell you that you would really be missing out!!  The blended soup somehow satisfies just a little more, making it just-the-right-amount-of hearty!

Vegetable Curry


¼ tsp ground cardamom
3 tsp tumeric
2 tsp red pepper flakes 
3 tsp ground cumin
2 tsp ground coriander
½ tsp cinnamon
¾ tsp sea salt – or more to taste
2 TBS olive oil
2 medium yellow onions, chopped
1 TBS freshly grated, peeled ginger
3 garlic cloves, crushed
1 large sweet potato, ¼ inch slices and then cut in half
½ a medium head of cauliflower – bite size pieces
1 can garbanzo beans
½ can coconut milk, lite if you prefer
optional toppings
         plain greek yogurt
fresh cilantro, chopped
Combine cardamom thru salt in a small bowl and set aside.

To make the spice mix, combine the cardamom through salt into a ramekin and set aside.

Heat oil in a heavy dutch oven over medium-high heat.  Stir in onions and sauté until soft, just a couple minutes.  Add the ginger, garlic and spice mixture.  Cook another couple minutes until the spices are fragrant. 

Add about a 1/4 cup water to the dutch oven and scrape off the bits of flavor that have stuck to the bottom of the pan.  Then add 3 cups water, sweet potatoes and cauliflower. Stir to mix everything up.

Cover the pot and simmer for 20 minutes, until the potatoes are soft.  Taste and add more salt if needed.  Stir in the garbanzo beans and ½ the can of coconut milk and simmer 5-10 more minutes just to heat through.

Very carefully, ladle soup into a blender. I put in about ½ the soup for my favorite consistency.  The more you blend, the thicker the soup. Find the consistency that you like.  Do NOT fill the blender more than half way or once you puree it, the heat and all the soup will do it’s best to blow off the lid and fly in your face!!!  So, fill the blender ½ way and then pulse the puree button quickly while holding the lid on with your other hand.  By starting with the pulse, you should be able to figure out just how much you can give it without having burn marks on your face, while at the same time getting the soup to puree nicely. If you need to, pour the pureed blender-full into a large bowl and add more soup to the blender.  Once you have as much soup pureed as you would like, add all the pureed soup back into the dutch oven.  Keep warm until you are ready to eat. 

Ladle soup into bowls and allow people to top their soup with a dollop of yogurt (a very nice touch) and/or cilantro. 

Saturday, May 14, 2011

Granola

I do believe this is the best homemade granola recipe out there!  No, really, I do! It's sooo easy to make! It has only a tsp of sweetener per serving - ish I'm really just guessing but it's likely true)!! There are endless variations so you can change it up as you want! There is no one overpowering flavor that makes it difficult to throw into yogurt or over ice cream or into pancakes or whatever...

Come on... you gotta try it just once!!

It's soooo easy!!  AND did I mention... CHEAP compared to store bought granola! 


Granola

Preheat oven to 300 degrees

In a large bowl
4 cups rolled oats - I use old fashioned and not quick oats
1/2 cup flax seed
1 cup chopped walnuts, pecans or slivered almonds
1 tsp cinammon - little more  :)
1 tsp ginger 
1/4 tsp salt
1/4 tsp ground cloves
1/4 tsp all spice 

Mix all these together

Then pour the next three ingredients over top

1/3 cup oil - I use sunflower
1/3 cup agave nectar  - I usually pour about a TBSP of Molasses into the measuring cup first and then fill the cup up with agave - I find it's adds a richness and depth that you wouldn't get with the agave alone.  If you want it to taste like molasses, by all means add more.  (Other ideas below)
1/3 cup water


Mix all this together and spread out on a large baking sheet.  Bake in the oven for 35-40 minutes, stirring every 10 minutes or so.


When the granola is a nice golden brown, remove it from the oven and let cool on the baking sheet.  Once cool add...


1 cup dried fruit - in this mix I have dried cranberries and blueberries.  Throw in what ever you like! Or skip this step and add fresh fruit on top of your serving!  (It's even ok to add dark chocolate chips when you serve it over ice cream!)


Variations?!! Absolutely!!! Whatever you can think up...


Get crazy and bump up the spices with a 1/3 cup molasses (in place of the agave) and chopped up bits of candied ginger for a more gingerbread-type flavor, or try adding coconut and macadamia nuts to the original recipe.  How about pecans with maple syrup in place of the agave, or sesame seeds in place of the flax seed.  Try a mix of oats and a small flake cereal for a more muesli type granola.  


If you do get a bit crazy and discover some variation you love, share it with the rest of us so we can try it!!  I love to know what you all are up to and how you are making these recipes your own!!